Choosing the Perfect Driveway Material for Your Home
That small crack in your driveway isn’t just an eyesore; it’s a message. For most homeowners, the driveway is out of sight, out of mind—until it becomes a crumbling, weed-filled problem that can cost thousands to fix. But what if you could understand what your driveway is telling you, long before the damage becomes severe? A little knowledge can save you a major headache and a lot of money.
Viewing your driveway as more than just a place to park is the first step toward making a smart decision. It’s one of the largest and most visible features of your property, a key factor in improving a home’s kerb appeal. In practice, a cracked, stained surface can detract from even the most beautiful home, while a new, pristine one can instantly boost its value. It’s not just pavement; it’s a major investment.
Choosing the right surface often comes down to a few distinct options, each with its own personality. You have the heavyweights, like classic black asphalt and timeless grey concrete, which are the most common choices for a reason. Then you have the specialists, such as elegant interlocking pavers, rustic gravel, or even modern permeable surfaces that help manage rainwater. The right choice for a new home drive or a replacement depends entirely on your climate, budget, and style.
This guide provides a simple framework for weighing the real-world pros and cons of each material, cutting through the technical jargon. You’ll gain a clear path to choosing the perfect driveway that fits your needs, ensuring your investment looks great and lasts for years to come.
Asphalt vs. Concrete vs. Pavers: The 30-Second Head-to-Head Comparison
Choosing a new driveway material can feel overwhelming, but for most homes, the decision boils down to three popular contenders. Each one offers a different balance of cost, durability, and style. Understanding the core trade-offs is the first step toward finding the best material for a new home drive that fits your budget and climate.
Think of it as a quick head-to-head comparison. While exact prices vary by region and contractor, the general differences are consistent across the board. Here’s how they stack up on the factors that matter most to homeowners:
Asphalt (Tarmac): The Flexible Budget-Pleader
Upfront Cost: £ (Lowest)
Lifespan: 15-25 years
Maintenance: Needs to be sealed every 3-5 years to prevent cracks.
Best For: Colder climates (its flexibility helps prevent cracking in freezes) and smaller budgets.
Concrete: The Durable Classic
Upfront Cost: ££ (Moderate)
Lifespan: 30-40+ years
Maintenance: Very low; optional sealing can prevent stains.
Best For: Warmer climates and homeowners who prioritise long-term durability over initial cost.
Pavers: The High-End Stylist
Upfront Cost: £££ (Highest)
Lifespan: 50+ years
Maintenance: No sealing needed, but may require refilling joint sand and weeding.
Best For: Maximum kerb appeal and homes where easy, seamless repairs are a priority.
Ultimately, the asphalt vs. concrete paving cost is often the deciding factor. Asphalt gets you a new driveway for less money upfront, while concrete is a longer-term investment. A paver surface, on the other hand, is a premium feature that makes a strong design statement.
The Full Story on Asphalt: More Than Just Blacktop
Asphalt gets its flexible superpower from its simple recipe: a mix of stone, sand, and a sticky, black liquid called a binder. This tar-like binder is the glue that holds everything together, but it isn’t completely rigid. This pliability allows the entire surface to bend ever so slightly as the ground beneath it freezes and thaws. This is precisely why asphalt paving is a go-to choice in regions with harsh winters, as its ability to flex helps it resist the major cracking that can plague stiffer materials.
However, that powerful binder has an enemy: the elements. Constant exposure to sun and air dries out the binder, making it brittle and weak. This is what leads to a faded, grey appearance and eventually, a web of cracks. To stop this damage, sealcoating is non-negotiable. Think of it as sunscreen for your driveway—a protective liquid layer applied every few years that blocks the damaging elements and keeps the binder strong. The relatively low cost to seal an asphalt surface is a tiny price to pay to avoid expensive repairs down the road.
Asphalt represents a clear trade-off. It stands out as one of the best cheap driveway surface alternatives for its low upfront cost, but it asks for a commitment to that simple maintenance schedule. For many homeowners, this small, periodic chore is well worth the initial savings and decades of service a well-kept driveway provides. But if the idea of regular sealing sounds like a hassle you’d rather skip, you might be wondering about concrete’s legendary durability.
Decoding Concrete: Is It the ‘Set It and Forget It’ Solution?
If asphalt is the flexible contender, concrete is the rigid champion of durability. Homeowners often choose concrete for its impressive lifespan, which can easily exceed 30 years with very little maintenance. Unlike asphalt, it doesn’t require regular sealing to protect it from the elements. This strength, however, comes with a trade-off. Because concrete is so rigid, it can’t bend and flex with the ground during deep freezes and thaws. In regions with harsh winters, this makes it more susceptible to cracking than its more pliable asphalt counterpart.
Beyond its brute strength, concrete offers a surprising level of creativity. You aren’t just stuck with a plain grey slab. As one of the most popular modern residential paving ideas, contractors can press patterns into the surface while it’s still wet to mimic the high-end look of brick, slate, or cobblestone. These stamped concrete patterns and designs deliver the premium appearance of expensive materials at a fraction of the cost, dramatically boosting kerb appeal without breaking the budget.
The reality of any concrete driveway, however, is that it will eventually crack. Professionals manage this by cutting thin lines—called control joints—into the surface. These are essentially “planned cracks” that encourage the concrete to separate neatly in a straight line. When unplanned cracks do appear, figuring out how to fix cracks in a concrete surface becomes a challenge. Patches rarely match the colour and texture of the original pour, making repairs stick out. For those who want the ultimate in kerb appeal with the easiest repair options, the unique approach of pavers may be the perfect fit.
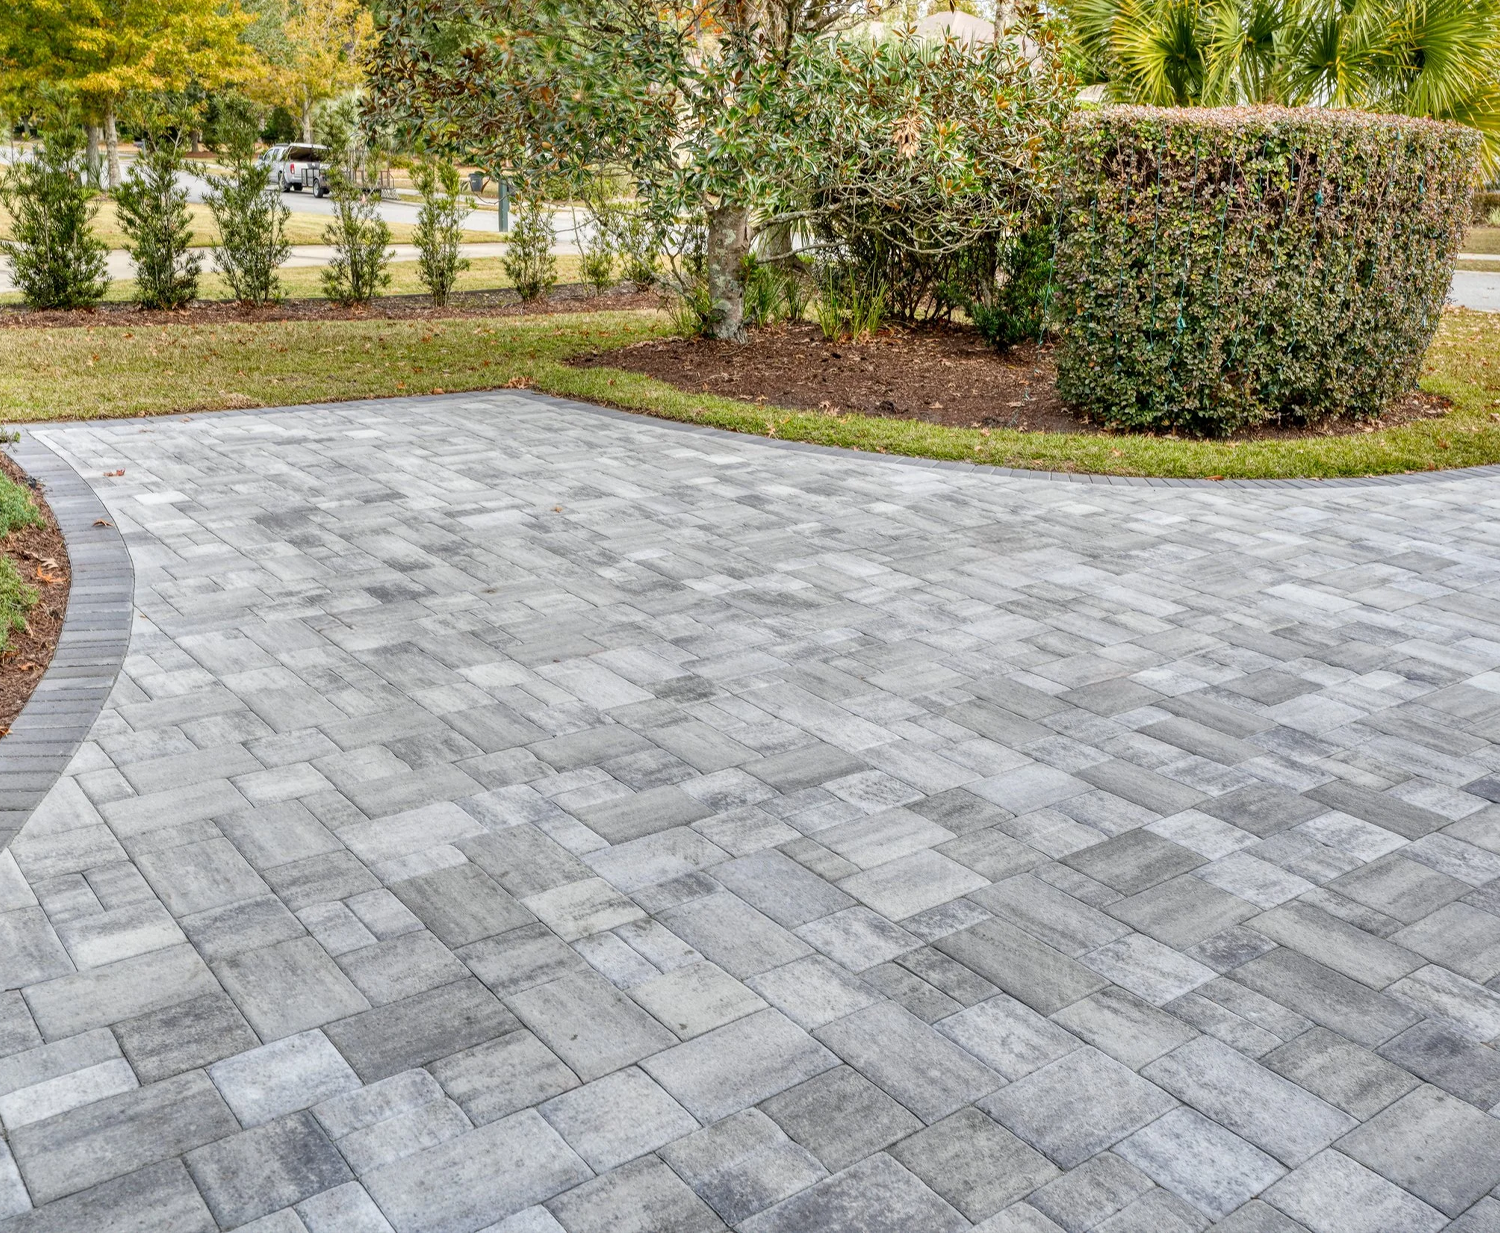
Pavers: The Secret to Ultimate Kerb Appeal and Easy Repairs
If the thought of a mismatched patch on your concrete driveway makes you cringe, pavers offer an elegant alternative. Instead of being one solid slab, a paver driveway is a flexible system of individual, precisely-formed bricks or stones. These interlocking pieces work together to create a durable surface that distributes weight evenly, all while delivering a classic, high-end look that stands out as one of the most versatile driveway ideas.
This system of individual blocks is the paver’s superpower when it comes to repairs. If a few pavers get cracked, settled, or stained from an oil leak, a contractor can simply pry them out and replace them with new ones. The repair is seamless and restores the driveway to its original look. This easy fix is the key to how long a paver surface lasts; a well-installed system can look great for 30 years or more precisely because you can spot-fix any problem areas.
That premium look comes from a meticulous, multi-layer installation. A proper paver driveway requires a deep, compacted gravel foundation, a levelling layer of sand, and finally the pavers themselves. Once the stones are set, a special polymeric jointing sand is swept into the gaps and activated with water, hardening to lock everything tightly in place. This labour-intensive process is why pavers have a higher upfront cost, but it’s essential for preventing weeds and shifting.
For homeowners looking to solve drainage problems, a special type called permeable pavers offers a clever, eco-friendly solution. Designed with slightly larger gaps, they allow rainwater to drain straight through the surface and into the ground below. The permeable paver drainage benefits are immediate: fewer puddles, less ice in the winter, and reduced runoff into storm drains. While elegant, a paver driveway is a significant investment. But what if your budget is tighter?
What Are My Options on a Tight Budget? Gravel and Other Alternatives
When your budget is the primary concern, a gravel driveway is one of the most popular cheap driveway surface alternatives. It offers a rustic, informal look and excellent drainage at a fraction of the cost of paved surfaces. However, a lasting gravel driveway is more than just a pile of stones. A proper gravel path installation guide would show that it requires a solid, compacted base to prevent ruts and a sturdy border to keep the stones contained. This border, or edging, can be made from simple materials like treated lumber, metal strips, or stone blocks, and is one of the most crucial DIY path edging options to consider to keep your lawn and driveway separate.
The appeal of that low cost, however, comes with a trade-off in maintenance. Loose gravel requires occasional raking to smooth out ruts and low spots, and you’ll need to add a fresh top layer every few years as stones get pushed into the soil or scattered. Gravel can also be dusty in dry weather and messy in wet conditions, meaning more dirt gets tracked into your home. It’s a functional solution, but one that demands a bit of ongoing work to keep it looking tidy and performing well.
For those seeking a middle ground between loose stone and solid asphalt, there’s another option: tar-and-chip. This surface is created by spraying a layer of hot liquid asphalt (the tar) onto a gravel base, followed immediately by a layer of small stones (the chips) which are rolled in to create a textured, stable surface. It provides a more fixed, rough-textured finish than loose gravel, offering better traction and less mess. But whether you choose elegant pavers, rustic gravel, or something in between, their success depends entirely on what’s underneath.
The Unseen Hero: Why Your Driveway’s Foundation Is More Important Than Its Surface
Think of your driveway as the icing on a layer cake. The beautiful surface you see—whether it’s smooth asphalt or decorative pavers—is just the top layer. The real strength comes from the cake underneath. For driveways, this unseen foundation is called the sub-base, a thick layer of compacted gravel that provides all the support. If this base is weak, uneven, or too thin, the surface above it is guaranteed to fail, no matter how good it looks on day one.
A properly prepared sub-base does two critical jobs: it distributes the weight of your vehicles and it manages water. During installation, your contractor should pack down this gravel layer tightly—a process called compaction—to create a solid, interlocking platform that won’t sink or shift. This platform also allows for proper drainage, giving rainwater and snowmelt a place to go. Without it, water gets trapped, freezes, expands, and pushes up from below, causing the cracks and heaves that can ruin a perfectly good driveway.
This is why many serious driveway problems aren’t actually surface problems. Those deep, connected “spider’s web” cracks or large, sunken areas are rarely the fault of the asphalt or concrete itself. Instead, they are red flags signalling that the sub-base has failed. Attempting a simple driveway repair on the surface without addressing the failing foundation underneath is like putting a small patch on a crumbling wall—it’s a temporary fix for a much larger issue.
When you’re getting quotes for new driveway paving, the most important question you can ask a contractor has nothing to do with the surface. Ask them, “How deep will you build the gravel base, and what equipment will you use to compact it?” A quality professional will have a confident, detailed answer. Their focus on this hidden layer is the single best indicator of a long-lasting job. But what if your foundation is already failing? Learning to read the cracks is the first step in deciding whether you need a simple fix or a major overhaul.
Repair or Replace? How to Read the Cracks in Your Driveway
So, you’ve spotted a crack. Is it a minor cosmetic flaw or a major warning sign? Learning to read what your driveway is telling you is the key to avoiding a costly mistake. While some issues are just skin deep, others point directly to the deep foundation problems we just covered. Understanding the difference is crucial before you spend a penny on a fix.
Pay close attention to cracks that look like a spider’s web or the scales on an alligator’s back. This pattern, fittingly called alligator cracking, is the biggest red flag your driveway can wave. It almost always means the sub-base is failing. Similarly, if you notice large, sunken areas where water pools or sections that have been pushed upward by frost, the problem isn’t the surface—it’s the failing foundation.
Deciding between a driveway repair and a full replacement can feel overwhelming, but a simple checklist can bring clarity. Ask yourself these three questions:
The 25% Rule: Is more than a quarter of the surface covered in cracks or potholes?
Foundation Issues: Are there large, sunken areas, “bird baths,” or widespread alligator cracking?
Age: Is your asphalt driveway over 20 years old or your concrete over 30?
If you answered “yes” to any of these, replacement is likely the most cost-effective choice long-term. Attempting to patch widespread, deep-rooted damage is often a waste of money, as the fixes will likely fail within a year or two. While knowing how to fix cracks in a concrete surface is useful, it’s for smaller-scale problems. If your driveway is still in good shape overall, however, there are some simple DIY fixes that actually work.
DIY Fixes That Actually Work: Sealing, Stain Removal, and Edging
If your driveway is structurally sound but looks a little tired, a few weekend projects can make a world of difference. Tackling ugly oil spots is a great place to start. The best way to remove oil stains from pavement involves a one-two punch: first, apply a driveway degreaser, a special cleaner you can find at any hardware store. Let it sit to break down the oil, then scrub it with a stiff brush and rinse it away. It’s a simple but effective method for lifting out those stubborn blemishes.
For those small, annoying cracks that aren’t part of a bigger foundation problem, a DIY fix can prevent them from getting worse. Look for a pourable crack filler, which is an acrylic-based liquid that you simply squeeze into cracks up to a half-inch wide. This quick task seals the gap against water, ice, and weeds, extending the life of your surface. While the full cost to seal an asphalt surface professionally is significant, this targeted fix costs very little and stops small issues in their tracks.
To give your driveway a truly polished look, consider its borders. Over time, grass and soil can creep over the edges, making the driveway look messy and undefined. Luckily, there are many simple DIY path edging options that create a sharp, clean line. Installing a no-dig plastic border or laying a simple soldier course of bricks can be done in an afternoon and instantly elevates your home’s kerb appeal.
These weekend tasks are more than just cosmetic fixes; they are a form of preventative care that protects your investment. By cleaning stains, sealing minor cracks, and defining the edges, you keep your driveway looking its best and delay the need for major, expensive work. But if you’re already dreaming bigger, there are even more impressive upgrades to consider.
Beyond the Basics: Heated Systems and Modern Paving Ideas
For those in snowy climates, the ultimate driveway upgrade is one you can’t even see: a heated system that melts snow and ice on contact. These systems work in one of two ways. Hydronic heating circulates a warm fluid through tubes embedded under the pavement, much like a car’s radiator system. The other common type, electric radiant heating, uses a mesh of durable cables that function like a giant electric blanket. The primary benefit is obvious—no more shovelling—but it also prevents damage from ice and corrosive salt.
The investment for such a system, however, is significant. Installing a heated driveway often adds £12 to £25 per square foot to your project cost, not including the ongoing utility expenses to run it. The convenience is undeniable, but the pros and cons must be weighed against a price tag that can easily rival a small bathroom renovation.
If a heated system isn’t in the budget, you can still achieve a high-end look. Many modern residential paving ideas focus on breaking up the visual monotony of a large slab for improved kerb appeal. Consider a “ribbon” driveway with strips of turf between two concrete tracks, or frame a simple asphalt surface with a contrasting border of elegant stone pavers. However, complex projects like these almost always require professional expertise to get right.
Hiring a Pro and Handling Permits: The Final Checklist
Even the best materials won’t last if they’re installed incorrectly, making your choice of contractor one of the most critical decisions for your new driveway. Before you sign any contract, arm yourself with a few non-negotiable questions. Ask for proof of liability insurance, get a detailed written estimate that specifies how they’ll prepare the base foundation, and request a list of local references you can call. A reputable professional will have no problem providing all three.
Along with finding the right team, you’ll need to consider local regulations. Many towns require a permit for projects that alter drainage or access to a public road, which includes many new driveways. A quick call to your local council’s planning or building control department is the easiest way to know for sure. Simply ask them, “Do I need a permit for paving my driveway at this address?” They will give you a clear yes or no and explain the next steps, if any.
Finally, as you gather quotes, a healthy dose of scepticism can protect you from a costly mistake. Be wary of contractors who seem too good to be true, and keep an eye out for these common warning signs.
Red Flags to Watch For:
Contractors who ask for a large cash deposit upfront.
Vague contracts with no detail on base preparation.
High-pressure sales tactics or “today only” deals.
Your Path Forward: Choosing the Right Driveway With Confidence
You’re no longer just looking at a slab of asphalt or concrete; you’re seeing a complete system. Before reading, a crack might have been a mystery and the material options a blur. Now, you can decode the story your current driveway is telling and understand what it takes to start fresh. This knowledge is your foundation for making a smart, confident decision that avoids costly mistakes down the road.
The best choice for your new home’s drive always balances three personal factors: your budget, your local climate, and the aesthetic you want. Your first step is to define a realistic budget. Next, consider how your weather will affect different materials. Finally, be honest about the maintenance you’re willing to perform. With clear answers, you are fully prepared to begin the driveway paving process and can confidently seek quotes from qualified professionals.
Your driveway is more than a place to park; it’s the opening statement for your home. Armed with this understanding, you can now explore different driveway ideas not with uncertainty, but with purpose. You are ready to create a welcome path that is functional, beautiful, and perfectly suited to your home’s story for years to come.